Hug your fromagiere
/So finally, after a couple of test mozzarella runs, I felt like we were ready to go to the next level of cheese-manufactory. Early last week, I shot a quick note off to my buddies Dan and Brian, and we arranged to meet up this weekend at my house for some group fromagerie.
I went to a nearby Whole Foods and bought up as much promising looking milk as I could. Contrary to my former belief, you don't actually need raw milk to make cheese. You just want to buy milk that hasn't been ultra-pasteurized, a process that takes the milk up to super-high temperatures. It extends the shelf-life, but it pretty much destroys all the delicious fatty compounds you're relying on to make your cheese. (more about that here). Fortunately, as I discovered when I set about my first test runs, the whole rise of the middle-aged/affluent grungy-hippie-tree-hugging-back-to-earther works in my favor. I can get low heat pasteurized milk at a pretty good grocery store.
Of course, the cashier's reaction to me plopping 12 or so gallons of milk onto the counter was a raised eyebrow.
"That's a lot of milk."
"I know. When I woke up this morning, I was just really thirsty."
Ha! I crack me up.
Confident that our first trials at a novice cheese like mozzarella would let us step up to the next level, I made preparations in the basement for the next homesteading event. Good cheese requires good cheese presses. And along with the other ingredients, I had bought the plans for a do-it-yourself cheese press
I had intended to build some additional shelving space for My Bride's canning gear anyway, so I took an afternoon and put up the cheese presses in a tucked away corner. These brackets would form the pivot point for the press arm.
Each of the hard cheeses would be placed in a basket, and pressed to drain the whey. I cut a circular press plate from poplar, and the brackets and rest of the pieces from oak. All clean, dense hardwood without as many pores as your typical pine. With the plans already drawn out, it only took a few minutes to put the whole thing together.
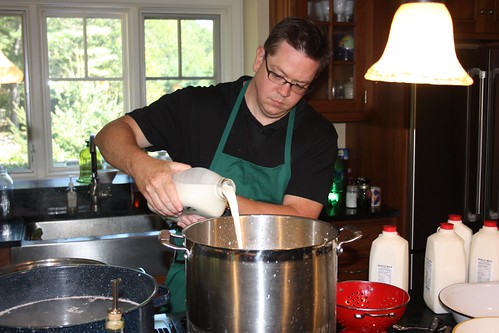
On Monday, the guys showed up (with their lovely families) and we were soon intent on replicating the mozzarella, just to as a warm up round. Here's the first tentative steps towards self-made queso confidence.
Once we each poured our milk into the pots, there was a lot of discussion about the proper stirring technique.
Dan and Brian waxed prolific on their favorite technique. I forget which advocated clockwise, and which was counter-clockwise.
Then I explained my approach: child-labor.
They both agreed my technique was superior.
Soon enough we were to the curd, stretch and mozzarella stage. The end product from Dan's effort was especially beautiful.
By now we were an hour or so into the day, and feeling pretty good about our dairy skills. It was time to up our game. We were going for cheddar.
Unlike the forgiving mozzarella, cheddar is a bit more involved of a process, involving a bacteria culture, twice the amount of milk and a bit more time, both up front and in the maturing stage. But we were now in the zone. We could do this. We gave each other the "let's cook this milk" nod, and dove in.
Look at Brian pour that milk with a self-confident flair.
Of course, maybe we should have read ahead in the instructions a bit further. Unlike mozzarella, cheddar involves several steps along the lines of: "add the mesophilic culture to the milk, and let it sit for 45 minutes."
Hmm.
Ok.
Sitting.
Then we add rennet, stir, heat, and - oh, what's this?
Ah.
Let sit for another 45 minutes.
Let's go check in with the families.
Hey, look! It's beautiful outside.
Whose dumb-ass idea was it that we be stuck in a kitchen for several hours hovering over mildly warm milk?
Our guest, Christina taught me that "cheese" in Swedish is "ost".
Ok. She didn't. But she could have if she wanted to. In her defense, I had asked her to help me translate while she was busy trying to groom her imaginary horse in between serious yard-circling riding. I apologized and we went back inside to check on the curd progression.
Perfect. Dan's pot is thick with curd. A quick slice of the firm, custard like curd into 0.5" cubes, and we were ready to begin heating again.
Occasionally, The Boy would come by to check on our progress.
Like a master chef, he would step up to the stove, put his spoon in to test our product at its current stage and pronounce his opinion of our work-effort with a serious and contemplative nod.
Apparently, so far, so good.
About this time, Dan spotted a step in the instructions I had somehow overlooked.
Once we had further separated the whey from the curds, we needed to hang and let dry our curds for an hour, in final preparation for pressing.
Hang? Someplace it can drip? Oh crap. Hold on... be right back.
Whew. I knew all those power tools would come in handy.
I put together this simple rack with a quick trip to the barn, and we drained our curds into cheesecloth, tied off, and hung. (Note: the one on the left is a double-sized batch made together by Dan and Brian).
And... again, we wait.
Ok, ok. With some forethought (and a couple more pots), we would have started the cheddar, and made the mozzarella during the lull periods (this is the 3rd "wait for a while" for those counting).
Yeah, well... who knew?
Soon enough, though, we were ready. The curds were relatively dry, and released from their cheesecloth bag, ready to be broken up, salted, and prepared for the form.
Once packed into the form, the proto-cheeses were taken down to the presses.
The brilliance of the press was soon apparent - each press was notched at precisely measured intervals (provided by the plans) specifying how much pressure two pounds of weight at the other end would provide.
The two pounds were conveniently provided by three and a half cups of water poured back into cleaned milk jugs.
Blam. That's science, folks.
One thing I learned from the whole cider making experiment: if you have a desire to recreate anything later on, take copious notes and LABEL EVERYTHING.
I have no idea which batch was which from the cider making, and no desire to try and re-live that particular mix up.
This time, we're using at least 3 different varieties of milk (not even Whole Foods carries large quantities of a single low-heat pasteurized brand), and I really wanted to know which worked best.
15 minutes at 10 pounds of pressure, and we were ready to release the pressure, and prep for the next step.
Before we made the switch, though, our quality tester came by to check up on our progress.
He gave us the green light.
Ready for 20 pounds of pressure (a different notch). A quick drop out of the form, flip of the cheese to turn it upside down and we re-insert.
At this pressure, the cheese will rest for 12 full hours, draining the whey into the collection pans.
Note the cheese on the far left is at a slightly higher angle. The form was a bit fuller, with more curds. That cheese came from High Lawn Farm - milked from pure Jersey cows, and they claim their milk is both more nutritious and flavorful, with all the stuff you want in your milk. Our side-by-side comparison shows a definite 5 or so percentage difference in the cheese-making stuff, anyway (note: the other milk used in this batch was from Crescent Ridge Dairy - a perfectly awesome place for milk, and what we normally drink around our house).
See? Labeling is cool.
The cheeses will be turned and pressed one more time after 12 hours, and then left to dry on a wooden board at room temperature for about 3-5 days. This will give them a slight rind as they cure, and then I'll coat each of them with a coating of cheese-grade wax, and we'll set them up in our cellar to cure for between 60 days and 6 months, depending on how long we can keep our hands off them.
At the end of our afternoon, Dan, Brian and I all lovingly wrapped our mozzarella in cling film, waved goodbye to our cheeses, dripping slightly in their forms, and promised to get together sometime around the holidays to taste test the fruits of our Labor Day.
As holiday weekends go: this was definitely a good 'un.


