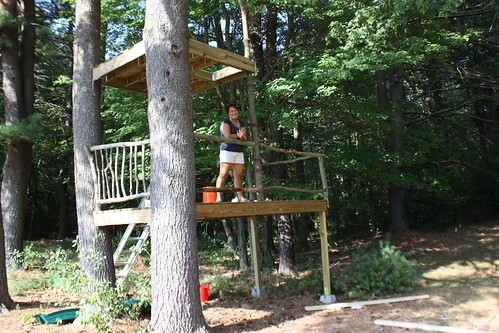
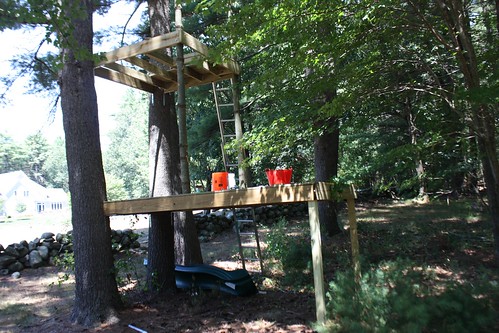
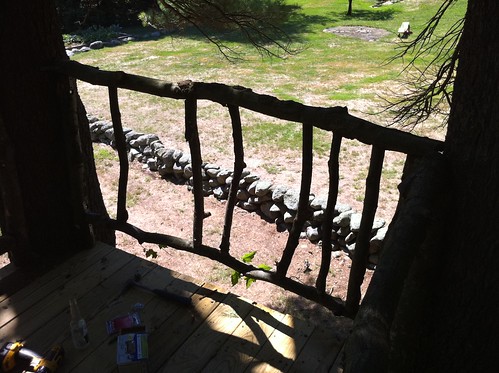
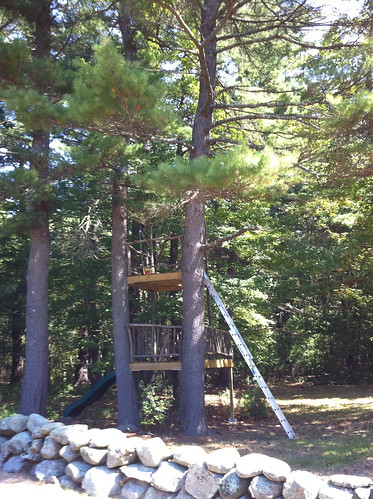
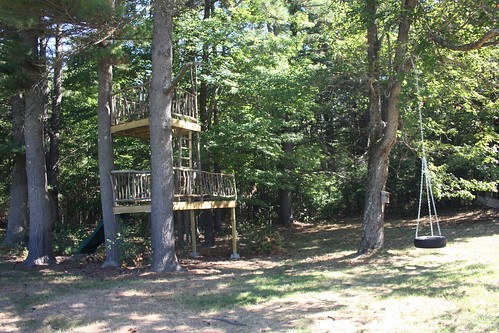
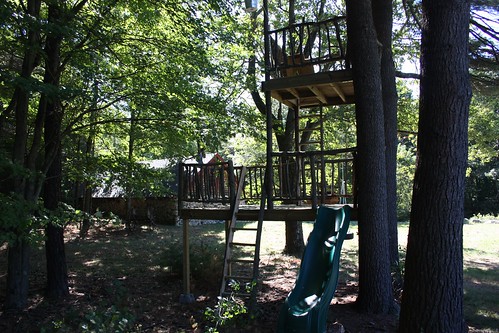
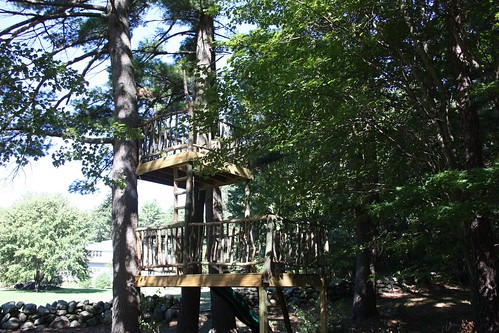
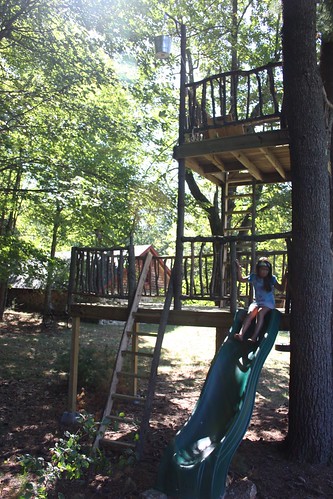
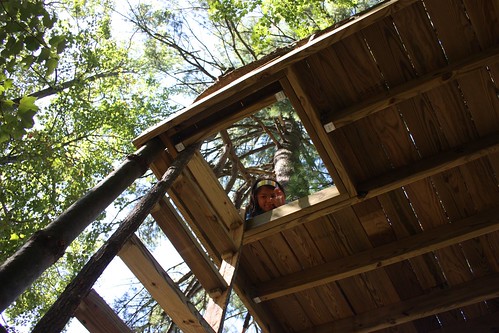
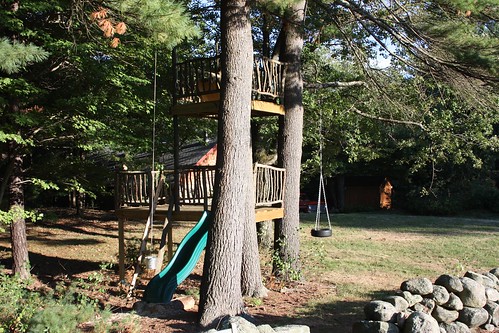
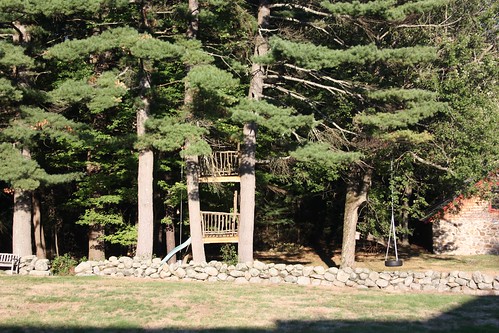
It doesn't have plumbing, but it can pick up the wi-fi
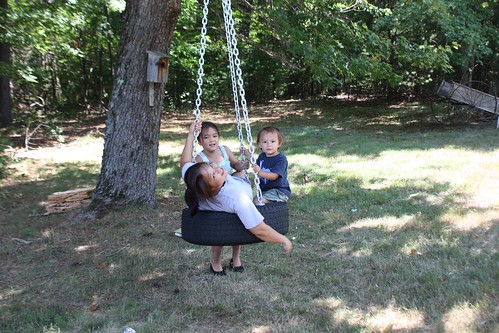
For about a year, the people I live with had been bugging me about a treehouse. It didn't start out that way. It started as a "we should think about one of those play structure things." I was quick to stomp on that idea. Look, I know I'm about to offend all of my friends who own them, but I have never in my life seen an attractive play structure. No, not even yours. In fact, especially not yours. They're just not very pretty. And as much as I get the whole "but the kids love to play on them" aspect, I'm the one who's got to sit on my porch and look out at the damned thing. So no. I'm not getting a play structure. Of course, trying to Put My Foot Down once my Bride has an idea in her head is about like telling the Iceland volcano that shut down air traffic this summer to get over the whole "ash" idea. A force of nature will not be denied. 
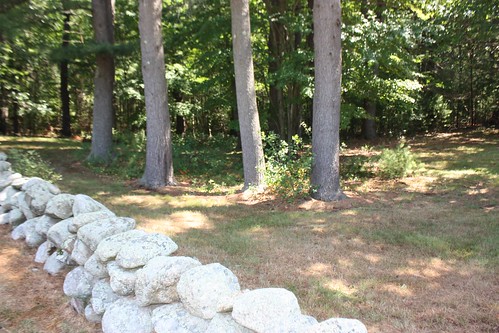
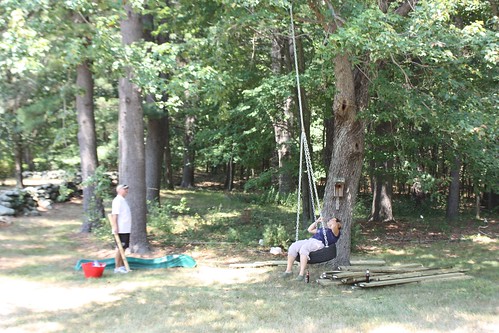
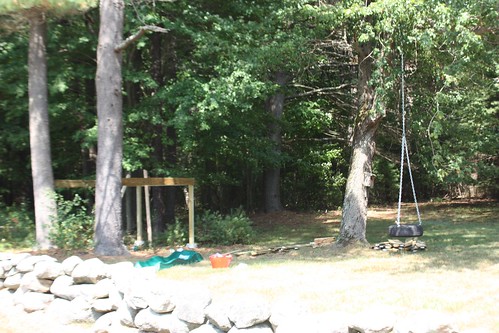
I tried enlisting my neighbors in my coercion (they have twin 5 year olds, and have so far resisted the play structure menace as well). I like my lawn. I like my yard. It goes with the house. Let's not mess with that, m'kay? But then my Bride played the "hey ass, you're not the one who's stuck with the kids all day through the summer. Easy for you to say no," card. Which, you've got to admit, is a pretty low blow. True, maybe, but wicked. And in a moment of weakness, I gave an inch. "What about a treehouse, instead?" 
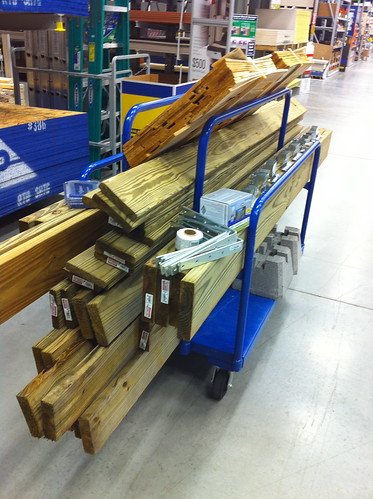
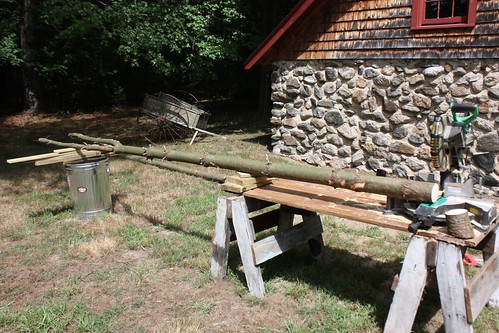
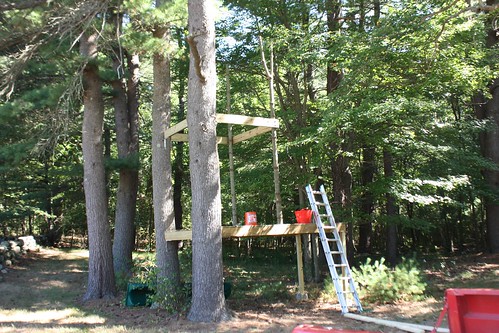
Holy appeasement, Batman, what the hell were you thinking? This then became, "But Daddy, you promised." Which then led to slippery slope. Which then led to a set of plans being drafted and put on my desk, and appropriate trees picked out.
I tried to find a quick way out of something a little less grand and arboreal, and offered up a tire swing. Who doesn't love a tire swing? And tires - they're free! (go to your local tire shop and just ask. Mine even helped me pick out the ones with the softest sidewalls - "better for sitting" the guy said. Didn't bat an eye, like people showed up every day to ask for these things.) "Oh! Great idea! We'll have a tire swing next to the tree house!" Wha- ? Next to? No.. instead of.. oh hell. Never mind.
Allright, fine. I'll give in. I will build a treehouse. But only if I have complete creative control. I want to build something that doesn't stick out like a sore thumb, and keep me up nights with the sheer unattractiveness of the whole thing. "No problem, Ken. Here are all of the feature requirements that must be included... Did we mention the climbing wall yet?" ... Sigh.
This is about half a treehouse. I had a sort of vague idea of what I wanted to do, and jotted down a scanty parts list before heading to Lowe's. Part of how I take my vengeance on my Bride for coming up with all of these lovely project ideas is by never writing anything down or drawing up plans. It drives her highly detailed, scientific brain absolutely crazy. It also means that I am guaranteed to make at least half a dozen trips back to the hardware store before I'm done. I consider this a small price to pay to wreak my petty vengeance. Also. What's not to love about a trip to the hardware store? Having picked out the spot, I had our buddy Tom come over one lovely Saturday morning to help me put up the first set of stringers. Notice please what my lovely Bride is doing here while we plot our first bit of heavy lifting:
She calls that "supervising." In a pretty good morning's effort, though, we soon had the basic shape up. In my teenage years, I often would work weekends and summers with my step-father, the Carpenter (amongst other skills). I was always a fairly slow learner, but eventually, I figured out which end of the hammer to point at the nail, and after a few weeks of this, he'd set me to building those little stoop-porch things off the back doors in this one sub-division we were working in. Nothing fancy. Just a basic little raised square with rails. They were constructed like little 4' x 6' decks. I think he gave me thirty or forty bucks for each one I completed. Which was pretty good money back in the day, and turned out to be one of many pretty good skills he passed on that I'd find handier than I could've imagined years later. (My step-father occasionally reads this 'blog as well, when I call him up and tell him I've put something up on The Internet that he might like to read. Last time I talked to him, he pointed out the flaw in the coffee table I built recently. And damn him, he was right, too. [hint: I mis-used the biscuits]. If I had to guess, that's why Norm hasn't stopped by yet.) Turns out, a treehouse is remarkably like a deck in basic construction.
As we finished putting this up, though, it soon became apparent that I was only partially succeeding in my quest to make the whole thing blend. I sat down and sat on it for a while over lunch (and while Tom headed off a little more sore for his morning's effort but seriously appreciated) to give it a good think. Hey. Those trees that surround our property. Hmm.
I have a chainsaw I bought about a year or two ago that's been gathering dust. I knew it would come in handy one day. I began thinking about how I could integrate more "tree" into the treehouse. Just to keep with the motif, you see. So I took the rest of the day and wandered through the woods, cutting down likely looking trees, which would start to be shaped into further support posts, rails and spindles.
Oh yeah. Did I mention the whole thing was going to be two levels high? And not a dinky set of levels, either. If I'm building the treehouse, I expect to be able to walk upright on both levels. Of course, when I added up what this would mean, I realized that the floor of the second level had to be about 15+ feet off the ground (accommodating the width of the joists, my 6' tall frame, etc. etc.) Hmm. It's pretty high up there.
Ah well. The kids are bouncy. We should be fine, right? I soon figured out that the problem with insisting on creating each spindle and rail from hardwood trees cut out of the forest (anywhere from 1.5 to 3 inches in diameter) meant that I needed to cut a lot of little saplings. But they're hardwood, and I didn't want to de-forest any particular spot. So there was a lot of hiking around the perimeter of our property involved, finding, cutting and then hauling likely looking trees (and then disposing of the scraps and spindly, un-usable tops). And then, I had to measure and cut each spindle individually to accommodate the curves and "naturalness" of the shape in the rails and spindles.
In other words, this whole process took for-freaking-ever. (Or about 4 full weekends of effort.) Plus a whole lot of scratches, cuts, soreness and bitching on my part. Also: do not wear Tevas while wielding a chainsaw. I'm not going to tell you how I know this, because my kids might read this one day, but I'm just saying: you will frighten the hell out of yourself.
I did cave in and mail-order a slide from some internet store or another to add to the tree-house. Have you ever tried to by just the slidey-bit? Without the whole play-structure? Yeah, I had never thought of that either. Turns out, you can buy them at Lowe's, too, just like that, on their own. Of course, I didn't figure this out until after I had paid shipping and handling on one to be hand delivered to the house. Um. Well. Oops. However, I did get the bright idea that I would actually hand cut both the ladders (one to the first level, and then one up through the trap door in the second level), by splitting one of my larger saplings (6-8") lengthwise down the middle.
Somehow, randomly, I managed to choose oak trees for both of them. Oak, for those not as familiar with it, is about the hardest of the hardwoods that I could have chosen out of the nearby forest. It took me two saws and about an hour and a half to split the first 9' sapling. Did I mention we've been experiencing a record hot summer of well over 90 degrees and 90 percent humidity? It was at about this point that I decided all treehouses were stupid. And the people that build them are noble heros who deserve all the cocktails they can drink. Fortunately, my cheering section would come by to check on me and see how things were going every once in a while. And to pick up the occasional screws I would drop from two stories up along the way, or give the cordless drill a quick test, just to see if his father was paying attention. Notice how grubby he is in this picture. This pretty much sums up The Boy's state of being for the entire summer.
Eventually, however, the whole thing was done, more or less. We didn't hold an official ribbon-cutting ceremony, mostly because I had dulled every sharp blade we owned in trimming down all those trees to finish the tree before the winter set in.
I had been convinced that this thing was going to be my never-ending opus for a while, and that I was destined to cut and schlep branches and stumps every weekend for the rest of my natural life. (things really slowed down when I hit the rails on the second level - having to cart and carry them up and down two separate ladders tends to bring you to a bit of a crawl).
OK, so there's no climbing wall yet. (That'll go on the back, as soon as I figure out what kind of wood I'm going to use to create it). But there is a trap door. And a bucket and pulley for hauling things up to the second level.
Overall, I'm pretty happy with it. It's not completely camouflaged, but it doesn't stick out as bad as it might. And as much as I grumbled during the making of it, I have to admit, it was kind of fun to tackle as a problem to be solved. And of course, seeing the first bunch of kids come over and scramble up and down the ladders into their brand new, not-so-secret clubhouse did make the whole effort seem pretty worthwhile.
It's all becoming part of what has turned out to be one of the most magical summers on record, with weather, holidays and general family together-time adding up to the perfect recipe for a childhood, young or old.
See? Fairly blendy. For a glorified play structure. Now: Bring on the Autumn. I've got another project or two in mind.
Read More

Hug your fromagiere

So finally, after a couple of test mozzarella runs, I felt like we were ready to go to the next level of cheese-manufactory. Early last week, I shot a quick note off to my buddies Dan and Brian, and we arranged to meet up this weekend at my house for some group fromagerie. I went to a nearby Whole Foods and bought up as much promising looking milk as I could. Contrary to my former belief, you don't actually need raw milk to make cheese. You just want to buy milk that hasn't been ultra-pasteurized, a process that takes the milk up to super-high temperatures. It extends the shelf-life, but it pretty much destroys all the delicious fatty compounds you're relying on to make your cheese. (more about that here). Fortunately, as I discovered when I set about my first test runs, the whole rise of the middle-aged/affluent grungy-hippie-tree-hugging-back-to-earther works in my favor. I can get low heat pasteurized milk at a pretty good grocery store. Of course, the cashier's reaction to me plopping 12 or so gallons of milk onto the counter was a raised eyebrow. "That's a lot of milk." "I know. When I woke up this morning, I was just really thirsty." Ha! I crack me up. Confident that our first trials at a novice cheese like mozzarella would let us step up to the next level, I made preparations in the basement for the next homesteading event. Good cheese requires good cheese presses. And along with the other ingredients, I had bought the plans for a do-it-yourself cheese press
I had intended to build some additional shelving space for My Bride's canning gear anyway, so I took an afternoon and put up the cheese presses in a tucked away corner. These brackets would form the pivot point for the press arm.
Each of the hard cheeses would be placed in a basket, and pressed to drain the whey. I cut a circular press plate from poplar, and the brackets and rest of the pieces from oak. All clean, dense hardwood without as many pores as your typical pine. With the plans already drawn out, it only took a few minutes to put the whole thing together. On Monday, the guys showed up (with their lovely families) and we were soon intent on replicating the mozzarella, just to as a warm up round. Here's the first tentative steps towards self-made queso confidence.
Once we each poured our milk into the pots, there was a lot of discussion about the proper stirring technique.
Dan and Brian waxed prolific on their favorite technique. I forget which advocated clockwise, and which was counter-clockwise.
Then I explained my approach: child-labor. They both agreed my technique was superior.
Soon enough we were to the curd, stretch and mozzarella stage. The end product from Dan's effort was especially beautiful.
By now we were an hour or so into the day, and feeling pretty good about our dairy skills. It was time to up our game. We were going for cheddar. Unlike the forgiving mozzarella, cheddar is a bit more involved of a process, involving a bacteria culture, twice the amount of milk and a bit more time, both up front and in the maturing stage. But we were now in the zone. We could do this. We gave each other the "let's cook this milk" nod, and dove in. Look at Brian pour that milk with a self-confident flair.
Of course, maybe we should have read ahead in the instructions a bit further. Unlike mozzarella, cheddar involves several steps along the lines of: "add the mesophilic culture to the milk, and let it sit for 45 minutes." Hmm. Ok. Sitting.
Then we add rennet, stir, heat, and - oh, what's this? Ah. Let sit for another 45 minutes. Let's go check in with the families.
Hey, look! It's beautiful outside. Whose dumb-ass idea was it that we be stuck in a kitchen for several hours hovering over mildly warm milk?
Our guest, Christina taught me that "cheese" in Swedish is "ost". Ok. She didn't. But she could have if she wanted to. In her defense, I had asked her to help me translate while she was busy trying to groom her imaginary horse in between serious yard-circling riding. I apologized and we went back inside to check on the curd progression.
Perfect. Dan's pot is thick with curd. A quick slice of the firm, custard like curd into 0.5" cubes, and we were ready to begin heating again.
Occasionally, The Boy would come by to check on our progress. Like a master chef, he would step up to the stove, put his spoon in to test our product at its current stage and pronounce his opinion of our work-effort with a serious and contemplative nod. Apparently, so far, so good.
About this time, Dan spotted a step in the instructions I had somehow overlooked. Once we had further separated the whey from the curds, we needed to hang and let dry our curds for an hour, in final preparation for pressing. Hang? Someplace it can drip? Oh crap. Hold on... be right back.
Whew. I knew all those power tools would come in handy. I put together this simple rack with a quick trip to the barn, and we drained our curds into cheesecloth, tied off, and hung. (Note: the one on the left is a double-sized batch made together by Dan and Brian). And... again, we wait.
Ok, ok. With some forethought (and a couple more pots), we would have started the cheddar, and made the mozzarella during the lull periods (this is the 3rd "wait for a while" for those counting). Yeah, well... who knew? Soon enough, though, we were ready. The curds were relatively dry, and released from their cheesecloth bag, ready to be broken up, salted, and prepared for the form.
Once packed into the form, the proto-cheeses were taken down to the presses. The brilliance of the press was soon apparent - each press was notched at precisely measured intervals (provided by the plans) specifying how much pressure two pounds of weight at the other end would provide. The two pounds were conveniently provided by three and a half cups of water poured back into cleaned milk jugs. Blam. That's science, folks.
One thing I learned from the whole cider making experiment: if you have a desire to recreate anything later on, take copious notes and LABEL EVERYTHING. I have no idea which batch was which from the cider making, and no desire to try and re-live that particular mix up. This time, we're using at least 3 different varieties of milk (not even Whole Foods carries large quantities of a single low-heat pasteurized brand), and I really wanted to know which worked best.
15 minutes at 10 pounds of pressure, and we were ready to release the pressure, and prep for the next step. Before we made the switch, though, our quality tester came by to check up on our progress.
He gave us the green light. Ready for 20 pounds of pressure (a different notch). A quick drop out of the form, flip of the cheese to turn it upside down and we re-insert.
At this pressure, the cheese will rest for 12 full hours, draining the whey into the collection pans.
Note the cheese on the far left is at a slightly higher angle. The form was a bit fuller, with more curds. That cheese came from High Lawn Farm - milked from pure Jersey cows, and they claim their milk is both more nutritious and flavorful, with all the stuff you want in your milk. Our side-by-side comparison shows a definite 5 or so percentage difference in the cheese-making stuff, anyway (note: the other milk used in this batch was from Crescent Ridge Dairy - a perfectly awesome place for milk, and what we normally drink around our house). See? Labeling is cool.
The cheeses will be turned and pressed one more time after 12 hours, and then left to dry on a wooden board at room temperature for about 3-5 days. This will give them a slight rind as they cure, and then I'll coat each of them with a coating of cheese-grade wax, and we'll set them up in our cellar to cure for between 60 days and 6 months, depending on how long we can keep our hands off them. At the end of our afternoon, Dan, Brian and I all lovingly wrapped our mozzarella in cling film, waved goodbye to our cheeses, dripping slightly in their forms, and promised to get together sometime around the holidays to taste test the fruits of our Labor Day. As holiday weekends go: this was definitely a good 'un.
Read More

In Racing Car years, that's 3.

Last week, the Boy turned 3. I kept it a little late to get him to be able to tell you this himself. "How old are you?" "Racing car." "Yes, I see that. Now how old are you?" "Racing car!" "Ok. Yes. But how old are you?" "RACING CAR BIRTHDAY!" Yeah. Move over, Thomas. We've got a new vehicle passion. Can you guess the theme of this year's birthday party? On the way home from Prince Edward Island (still need to put those pictures together), my Bride tossed out some ideas to celebrate a Racing Car Birthday. About halfway through the list, she mentioned soap box cars. I can't remember the rest, now. Partly because I was trying to spot a moose (they had about a million signs for them on the road - it's kind of raising expectations, there, you know Canada? Don't' put the signs out if you don't want me to expect some moose. And why don't I ever see a moose in a zoo? I've been to San Diego. No moose. Dear Canada. That's just selfish.), and partly because I had already sprinted halfway down the path of figuring out what I'd need to do that. Soap box cars are just 50's enough, with the right little bit of splintery-crash potential to make it Boy Birthday Worthy. I think my Bride spotted the gleam that crept into my eye, because she started talking about helmets or something. I sort of tuned it out, so I can't say exactly. That weekend, by sheer random chance, I found a really old wagon in the swap shed at the dump (or more properly, the transfer station). It was about to fall apart, with rotting wooden panels. The wheels, however, were only slightly rusty, and otherwise in perfect working order. Clearly, the universe wanted me to build soap box cars.
The first monday back in the office, I trotted over at lunch to a nearby bike shop and asked for 4 identical front tires, cheapish. That got me a funny look, so I had to explain that a) back wheels have gears. I'm not interested in gears. And b) I'm planning on totally mis-using the tires when I get them. When I explained what I had in mind, the bike guy's eyes lit up. (Cambridge Bicycle - those guys seriously rock the bikes). He talked me out of the 10-speed road-racing wheels I was eyeing, and into something a little more rugged and straightforward on the 20" BMX side. A quick trip to the lumber yard later for some extra bits, and I was ready to roll. Er. Pardon the pun.
Soap box cars are basically 4 wheels on a cart intended to roll down hill under gravity power. In other words, no engine. They usually have steering of some sort. Or at least, I assume so. I'd never actually built one before, so I was kind of going off guess work, so to speak. But the wagon's front set of wheels already had a perfectly good steering handle, so I figured I'd make the most of that, and mounted it to the base of my theoretical first soap box car.
The other one was a bit trickier, though. The rear wheels on your typical Red Flyer wagon are fixed. No handy steering column. Some thoughtful wandering up and down the aisles of the super-box hardware store though, and I had spotted a heavy duty caster held together with a single bolt. I took the bolt out, removed the wheel, and built a new platform to fix the rear wagon wheels to. Instant pivot. Damn, I'm good.
Mostly the rest of the body was just for show, and I sort of freehanded some rear cabinet areas for the back of the soapbox car. The shape wasn't important, really, except that it would act both as a seat back and a place to fix the rear wheels. Because of that latter point, I bought heavy duty, 3/4" plywood. I figured that'd hold up to at least a couple of weekends of heavy duty 3 year old use.
The bike wheels are mounted simply through the plywood with a large washer and bolt. The axle was just about long enough to go through once I had drilled out the plywood with a forstner bit to fit the washer flush to the surface. I added a short 2"x4" underneath the body to stiffen the plank, and the whole thing was surprisingly sturdy.
Soon enough I had the fronts on as well, along with some panels to fill in the box pieces on front and rear. For the jury-rigged rear wheel/castor pivot one, I had to create a wooden handle. This sort of worked, and I was getting a little tired at this point. What the hell. They're 3. What are they going to do, call the Soap Box police on me?
It was about this time that I took one of these near complete cars down the hill in my back yard for a test drive. I figured if it could take me, it would hold up to most anything the kids would do. Of course, I'm a little tall for the car, but the hill wasn't so very steep. I shoved myself in and jumped down the hill. Hard to steer. I made it most of the way down before I tipped the whole thing over and tumbled out onto the grass. Hmm. Maybe some guard rails are in order.
My Bride made one more half-hearted suggestion that I add "bring your own helmets" to the birthday party invitation. Ha! We were lined up and ready to go.
Look! Racing car cupcakes! (my Bride is quite crafty in her own right).
Soon enough, the kids came over and leapt into the cars. There was some notion that we'd do proper, organized races. Instead, we sat on the patio and watched the kids hurtle up and down the hill. Sometimes two at a time.
Sometimes solo.
Or with a push.
We didn't even have to push them back up the hill. They were having so much fun, they'd do it themselves.
Or help one another out.
Eventually, the Critter and a couple of the bigger kids figured out that they could actually perch up on the back of the car, and ride down that way.
Eventually, there was cake. It also had cars on it.
And at the end of the party, everybody got their own Piston Cup. Everybody wins!
Happy birthday, little buddy. Enjoy 3. It doesn't last long enough.
Read More