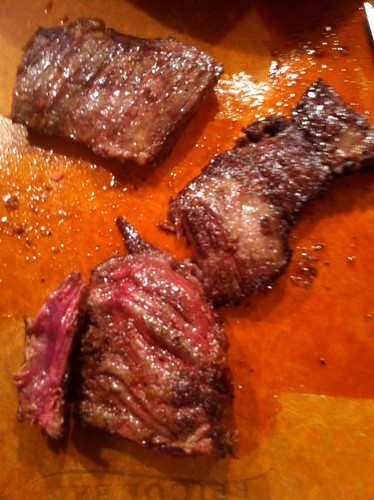
Autumn == Meat

When the air grows crisp and cool, and we're having fires in the fireplace more evenings than not, I know that it's about time to re-stock the freezer. Mind you: it's a big freezer. This takes some planning. Last year, we bought two whole pigs. The process went like this: - I called a dairy farmer in our village that I had met and done some earlier business with. - I asked him if he knew anybody that was selling meat wholesale. You know, since he's in the farm community. - He mentioned that he just happened to be raising two pigs. - Awesome. Lemme have some of that pig action, my friend. - I never once fed the pigs, washed the pigs, or cleaned up pig poop. - The pigs were transported to the slaughter house without my participation, where I first met their clean, fresh carcasses, and started the whole processing, um, well, process. It was a beautiful arrangement, with the all-in price of about 2 and a half bucks/pound. We did, however, end up with a hell of a lot of pork. Pork chops. Pork ribs. Bacon. Ham. Pancetta. Sausage. Pulled Pork. You name it. That's a lot of pig, even spaced out over the course of a year. So this year, when it came time to call my farmer buddy, I told him that even though I was going to buy and handle both pigs again, I was only going to keep one (another friend down the road wanted the other one). I was in the market for something different to fill out my freezer. Lamb. Beef. Something. "Well! I just happened to buy some beef-steers this year, to round out my dairy herd!" Holy crap. Everybody needs to make friends with a farmer. Sign me up, farmer-buddy. Once again, I never met any of the animals alive. Don't get me wrong, I'm not terribly squeamish about it at this point. I just didn't see the need to make a special trip to pet my dinner. It would probably have upset some of the parents who were bringing their toddlers by the farm to pet the cute little animals if I happened to mention it while I was there. Still, I do want to offer a shout out to the amazing family that's running Great Brook dairy farm (my meat dealer, as it were). It's a beautiful place and an amazing resource just a couple of miles down the road. In addition to meat-on-the-hoof, they also make some pretty kick-ass ice cream. Stop by if you get the chance.
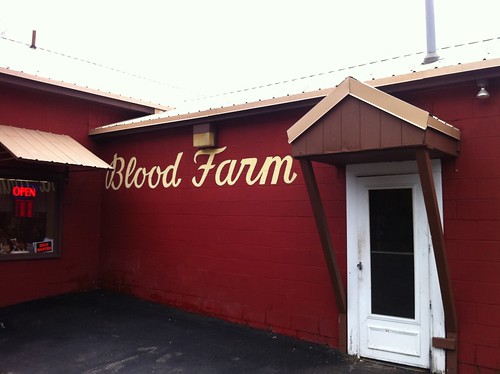
Last year, the arrangement of all the necessary logistics was a pretty major headache. I had never done this before and needed to look everything up from scratch, with a lot of asking questions of people involved. Who the hell slaughters whole animals? Turns out: not many are allowed to. You need to be registered by the state. And most of those that are only deal in furry creatures bound for plastic wrap in your neighborhood Shops-A-Lot. This year, I learned from my previous exercise, and had everything arranged well in advance. Our slaughterhouse is a quaint little place that is named after the family that's owned it for several generations. I couldn't make this place up if I tried.
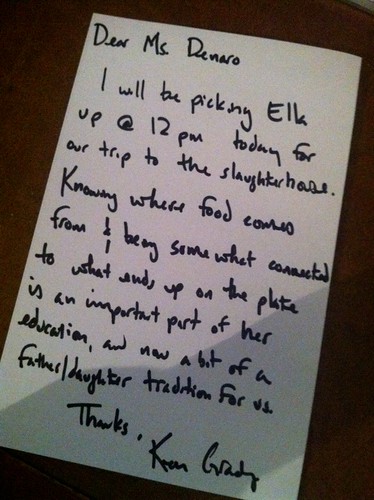
In what's become a bit of a tradition and something to look forward to, I planned the time and day of the pick-up such that I could take the Critter got to join me.
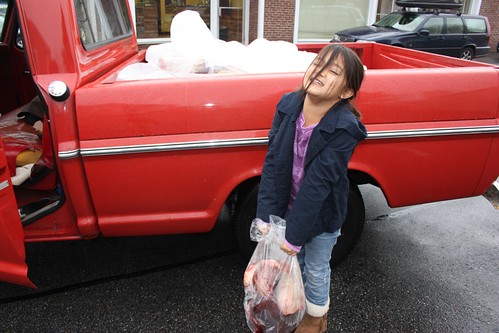
With more in the queue this year, I called ahead to ask if two pigs and a steer (which ends up in quarters) would fit in the back of my pick up truck. These animals weighed in at between 250-300 pounds apiece (the hogs) and a shocking 1,174 pounds (the steer) while 'on the hoof' (i.e. still oinking and mooing). Ok, I know that they lose some parts along the way, but I kept trying to picture fitting a bull and two hogs in the back of my truck, and coming up with some pretty scary mental images of the state of my old pick up at the end. Turns out, I needn't have worried. The sum of the parts is less than the sum of the whole(s). In other words: meat parts stack better than you'd think. Somehow, in my excitement to see the steer, I managed to completely miss taking pictures of the pigs. Oh well. I give you last year's picture, just so you know what I missed.
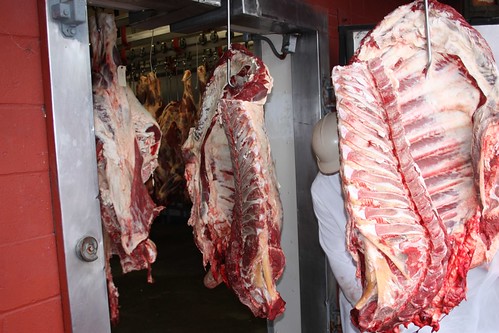
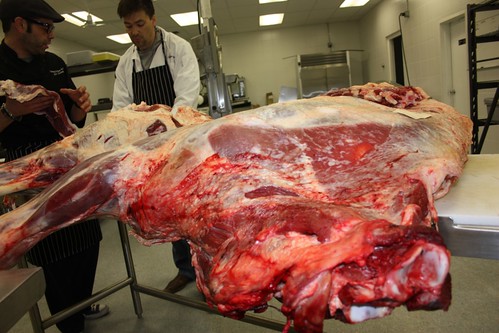
Even better, though, look at the beautiful cuts of beef that had been grazing just a day or two before that I did manage to capture as they came out.
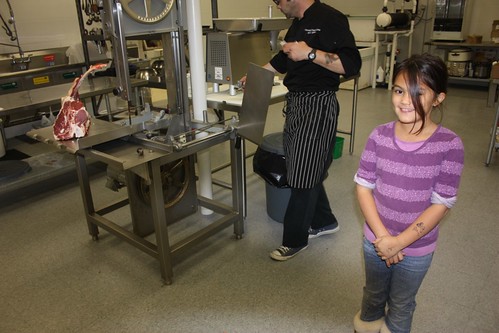
And look! Here the Critter holding the steer's heart and tongue! (they're shockingly heavy). Note: I figure one of my roles as a parent is to ensure that when she's in group therapy, she's got the best stories of the bunch.
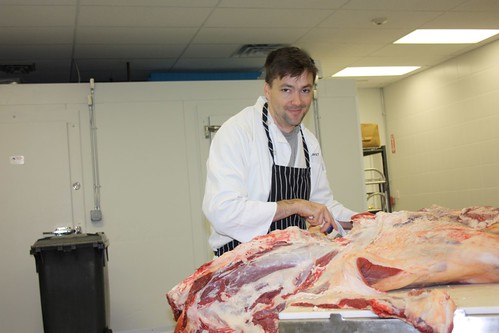
Best of all, perhaps, is that this year I had asked our butcher, Mike if I could, you know, maybe participate a little bit more in the processing of our animal? I really wanted to get to know more about where some of my favorite cuts (ribeye, hanger steak, flank steak) sit in relation to other cuts, and how the whole thing was broken down. Mike's a stud, and readily agreed. Here's Mike getting things ready.
And then Mike got us all down to business. Laying out the seams, tugging out the suet, finding the good cuts that we could handle without turning into (really expensive) hamburger. Mike showed a tremendous amount of both patience with all my questions, and passion for what he does. Truly, there is artistry in anything done well with skill. And Mike is an artist.
Look! One on my own! (a very rare moment)
Where was the Critter, and how was she handling all of this meaty fun, you ask? Not at all squeamish, I answer. She was operating the camera for those last few shots. But she was just as ready to pitch in.
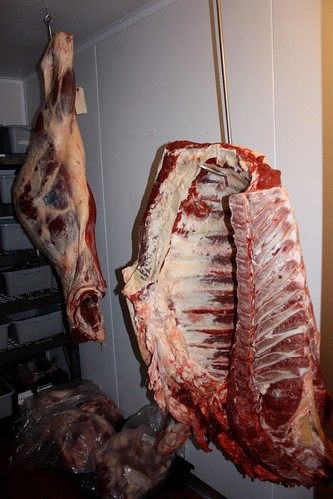
Soon, Mike had her hands on and a full participant. This was her final test - prepping a flank steak. Check out that grip. And that smile of real pleasure at being a part of the day. We hung two quarters in the cooler, where they'll mature and dry age for a further two weeks and then be broken down in a similar fashion. Only aged. And, you know, beefier. Dry-aged beef is the stuff they have in the special case in the back of Whole Foods that the rookies aren't allowed near. And we've got a half-cow worth of our own!
At the end of the evening, I ended up bringing a few choice cuts home with me. (the rest will be finished up and packed by Mike, the professional, who'll no doubt be a heck of a lot more efficient when he's not trying to explain each step as he goes, and keep me from cutting one of my own appendages off). I was practically dancing as I pulled the bits out to much "ooh-ing" and "ah-ing" from my Bride and the Boy, as if I was presenting a few bits of ruby treasure that I had stumbled upon. I quickly seared the inside skirt steak and served it with some simple fried potatoes and chanterelle mushrooms reduced in butter, as a sort of, "This is our cow. Let us savor the final introduction in all its loveliness."
Three days ago, this steer was still chewing his cud. Tonight, he was on our plate. That's fresh, delicious, circle of life, baby. Respect your meat. Hug your butcher.
Read More

Hug your fromagiere

So finally, after a couple of test mozzarella runs, I felt like we were ready to go to the next level of cheese-manufactory. Early last week, I shot a quick note off to my buddies Dan and Brian, and we arranged to meet up this weekend at my house for some group fromagerie. I went to a nearby Whole Foods and bought up as much promising looking milk as I could. Contrary to my former belief, you don't actually need raw milk to make cheese. You just want to buy milk that hasn't been ultra-pasteurized, a process that takes the milk up to super-high temperatures. It extends the shelf-life, but it pretty much destroys all the delicious fatty compounds you're relying on to make your cheese. (more about that here). Fortunately, as I discovered when I set about my first test runs, the whole rise of the middle-aged/affluent grungy-hippie-tree-hugging-back-to-earther works in my favor. I can get low heat pasteurized milk at a pretty good grocery store. Of course, the cashier's reaction to me plopping 12 or so gallons of milk onto the counter was a raised eyebrow. "That's a lot of milk." "I know. When I woke up this morning, I was just really thirsty." Ha! I crack me up. Confident that our first trials at a novice cheese like mozzarella would let us step up to the next level, I made preparations in the basement for the next homesteading event. Good cheese requires good cheese presses. And along with the other ingredients, I had bought the plans for a do-it-yourself cheese press
I had intended to build some additional shelving space for My Bride's canning gear anyway, so I took an afternoon and put up the cheese presses in a tucked away corner. These brackets would form the pivot point for the press arm.
Each of the hard cheeses would be placed in a basket, and pressed to drain the whey. I cut a circular press plate from poplar, and the brackets and rest of the pieces from oak. All clean, dense hardwood without as many pores as your typical pine. With the plans already drawn out, it only took a few minutes to put the whole thing together. On Monday, the guys showed up (with their lovely families) and we were soon intent on replicating the mozzarella, just to as a warm up round. Here's the first tentative steps towards self-made queso confidence.
Once we each poured our milk into the pots, there was a lot of discussion about the proper stirring technique.
Dan and Brian waxed prolific on their favorite technique. I forget which advocated clockwise, and which was counter-clockwise.
Then I explained my approach: child-labor. They both agreed my technique was superior.
Soon enough we were to the curd, stretch and mozzarella stage. The end product from Dan's effort was especially beautiful.
By now we were an hour or so into the day, and feeling pretty good about our dairy skills. It was time to up our game. We were going for cheddar. Unlike the forgiving mozzarella, cheddar is a bit more involved of a process, involving a bacteria culture, twice the amount of milk and a bit more time, both up front and in the maturing stage. But we were now in the zone. We could do this. We gave each other the "let's cook this milk" nod, and dove in. Look at Brian pour that milk with a self-confident flair.
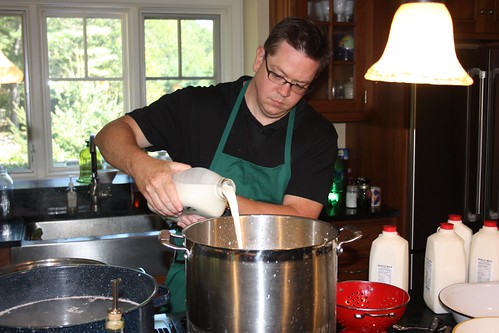
Of course, maybe we should have read ahead in the instructions a bit further. Unlike mozzarella, cheddar involves several steps along the lines of: "add the mesophilic culture to the milk, and let it sit for 45 minutes." Hmm. Ok. Sitting.
Then we add rennet, stir, heat, and - oh, what's this? Ah. Let sit for another 45 minutes. Let's go check in with the families.
Hey, look! It's beautiful outside. Whose dumb-ass idea was it that we be stuck in a kitchen for several hours hovering over mildly warm milk?
Our guest, Christina taught me that "cheese" in Swedish is "ost". Ok. She didn't. But she could have if she wanted to. In her defense, I had asked her to help me translate while she was busy trying to groom her imaginary horse in between serious yard-circling riding. I apologized and we went back inside to check on the curd progression.
Perfect. Dan's pot is thick with curd. A quick slice of the firm, custard like curd into 0.5" cubes, and we were ready to begin heating again.
Occasionally, The Boy would come by to check on our progress. Like a master chef, he would step up to the stove, put his spoon in to test our product at its current stage and pronounce his opinion of our work-effort with a serious and contemplative nod. Apparently, so far, so good.
About this time, Dan spotted a step in the instructions I had somehow overlooked. Once we had further separated the whey from the curds, we needed to hang and let dry our curds for an hour, in final preparation for pressing. Hang? Someplace it can drip? Oh crap. Hold on... be right back.
Whew. I knew all those power tools would come in handy. I put together this simple rack with a quick trip to the barn, and we drained our curds into cheesecloth, tied off, and hung. (Note: the one on the left is a double-sized batch made together by Dan and Brian). And... again, we wait.
Ok, ok. With some forethought (and a couple more pots), we would have started the cheddar, and made the mozzarella during the lull periods (this is the 3rd "wait for a while" for those counting). Yeah, well... who knew? Soon enough, though, we were ready. The curds were relatively dry, and released from their cheesecloth bag, ready to be broken up, salted, and prepared for the form.
Once packed into the form, the proto-cheeses were taken down to the presses. The brilliance of the press was soon apparent - each press was notched at precisely measured intervals (provided by the plans) specifying how much pressure two pounds of weight at the other end would provide. The two pounds were conveniently provided by three and a half cups of water poured back into cleaned milk jugs. Blam. That's science, folks.
One thing I learned from the whole cider making experiment: if you have a desire to recreate anything later on, take copious notes and LABEL EVERYTHING. I have no idea which batch was which from the cider making, and no desire to try and re-live that particular mix up. This time, we're using at least 3 different varieties of milk (not even Whole Foods carries large quantities of a single low-heat pasteurized brand), and I really wanted to know which worked best.
15 minutes at 10 pounds of pressure, and we were ready to release the pressure, and prep for the next step. Before we made the switch, though, our quality tester came by to check up on our progress.
He gave us the green light. Ready for 20 pounds of pressure (a different notch). A quick drop out of the form, flip of the cheese to turn it upside down and we re-insert.
At this pressure, the cheese will rest for 12 full hours, draining the whey into the collection pans.
Note the cheese on the far left is at a slightly higher angle. The form was a bit fuller, with more curds. That cheese came from High Lawn Farm - milked from pure Jersey cows, and they claim their milk is both more nutritious and flavorful, with all the stuff you want in your milk. Our side-by-side comparison shows a definite 5 or so percentage difference in the cheese-making stuff, anyway (note: the other milk used in this batch was from Crescent Ridge Dairy - a perfectly awesome place for milk, and what we normally drink around our house). See? Labeling is cool.
The cheeses will be turned and pressed one more time after 12 hours, and then left to dry on a wooden board at room temperature for about 3-5 days. This will give them a slight rind as they cure, and then I'll coat each of them with a coating of cheese-grade wax, and we'll set them up in our cellar to cure for between 60 days and 6 months, depending on how long we can keep our hands off them. At the end of our afternoon, Dan, Brian and I all lovingly wrapped our mozzarella in cling film, waved goodbye to our cheeses, dripping slightly in their forms, and promised to get together sometime around the holidays to taste test the fruits of our Labor Day. As holiday weekends go: this was definitely a good 'un.
Read More

300 year old coffee table

A few months ago, we had the attic of our house finished as a bedroom for the Critter. The attic runs across the top of the original part of the house (the 1739 farmhouse part), and has beams pegged together with hand-carved wooden pegs. The central chimney runs right up through the middle of the room, providing a natural sort of divider from a bed side, and a desk/toy/reading side. Very nice. I had started to do the work myself, framing out the edges and running wiring, but quickly realized that while I still possess the rudimentary knowledge to do these things, I was quickly going to get into finicky bits of plastering between the beams (because of course I wanted to keep them exposed) that would take me so long that the kid would be ready to move in, and then move out again for college at the end of the same week. So I called in some help. There was a little bit of demolition to do when the guys got started, and as they pulled up some of the old, unfinished floorboards, I had them set them all aside. It's not every day you come across 12+ inch wide, 300 year old heartwood pine planks.
I had an idea to build a coffee table from my buddy, Steve, which besides being a fun project to re-use some of the pieces of our house, would give me a great excuse to buy some new toys. I mean "tools." I replaced my 100 year old Craftsman jointer/planer with a beautiful new one from Delta, as well as a factory refurbished thickness planer from Hitachi. I've always wanted the latter, and it made ridiculously quick work of planing these boards smooth and clean. With some pre-turned legs I picked up, I soon had a lovely coffee table in the raw, so to speak.
I joined the boards with rabbetted joints, so that any expansion or contraction wouldn't create major gaps, and added a breadboard edge (that's the strip alongside each short edge) with my biscuit cutter. And then gave the whole thing a good sanding with the belt sander and then orbital sander. I was really giving my shop a decent work out, after sitting mostly idle since I made the Boy's bed over the winter.
I removed all the nails (except one little bugger that I didn't find until my planer started shooting out sparks when it hit it. Sneaky bastard. After which I ran back to my desk and ordered a metal detector wand to make sure I didn't kill the new blades), but I left the nail holes and blemishes alone. There are some knot holes and wear marks that sanding smooth just won't help. But that's all part of the charm. I played around with a few different stains and finally settled on Minwax' English Chestnut 233, and applied a couple of coats to get a nice, even, dark finish that fits in well with our other furniture.
The coffee table was destined for the big empty space in our media room, where we sit and comfortably consume tv, or a netflix movie. We had been desperate for a place to put our mojitos while playing the Xbox, or toss the pad thai container on take out night. Knowing it would get some pretty hard wear, I put several coats of semi-gloss polyurethane on it, sanding between each one. I used an oil based poly because it's more durable. But man, what a pain to have to wait 4 hours between each coat. This is really the most unsatisfying part of building something, I tell you. But eventually, I schlepped it up to its proper place, and it fit right in.
Note, the actual dimensions of the coffee table are 47" x 27". It's just a stupidly large family room.
(as you can see, we're finally catching up with the rest of Western Civilization and have started watching the back episodes of "24".) Next project: tree house. (note, more in-progress pictures of the coffee table can be seen here, if you want.)
Read More