Happy all

 Christmas, 2015

Dear friend,

I just set off all the smoke alarms in the house again.

Remember the two wood stoves we bought when we moved to Maine? Because it was cold. And burning things to generate heat, I was assured, was all the rage up here.

The stoves are very pretty. But one of them is impossible for this Georgia native to light without creating a thick, soup-like haze of smoke throughout the first floor.  A smoke that has a will of its own, escaping every crack and joint in the woodstove that I can see. And a few that I’m pretty sure didn’t exist when we bought the thing.  Because I seem to be getting worse at lighting it each time I make the attempt. 

The trick, I’ve discovered, is to keep the back door open for the first fifteen or twenty minutes that I’m burning something in the stove. Eventually, it stops smoking, and the fire settles in for a bit. Of course, by that time, the cold wind has been blowing in through the back door, and is threatening to create a new arctic front in the kitchen.

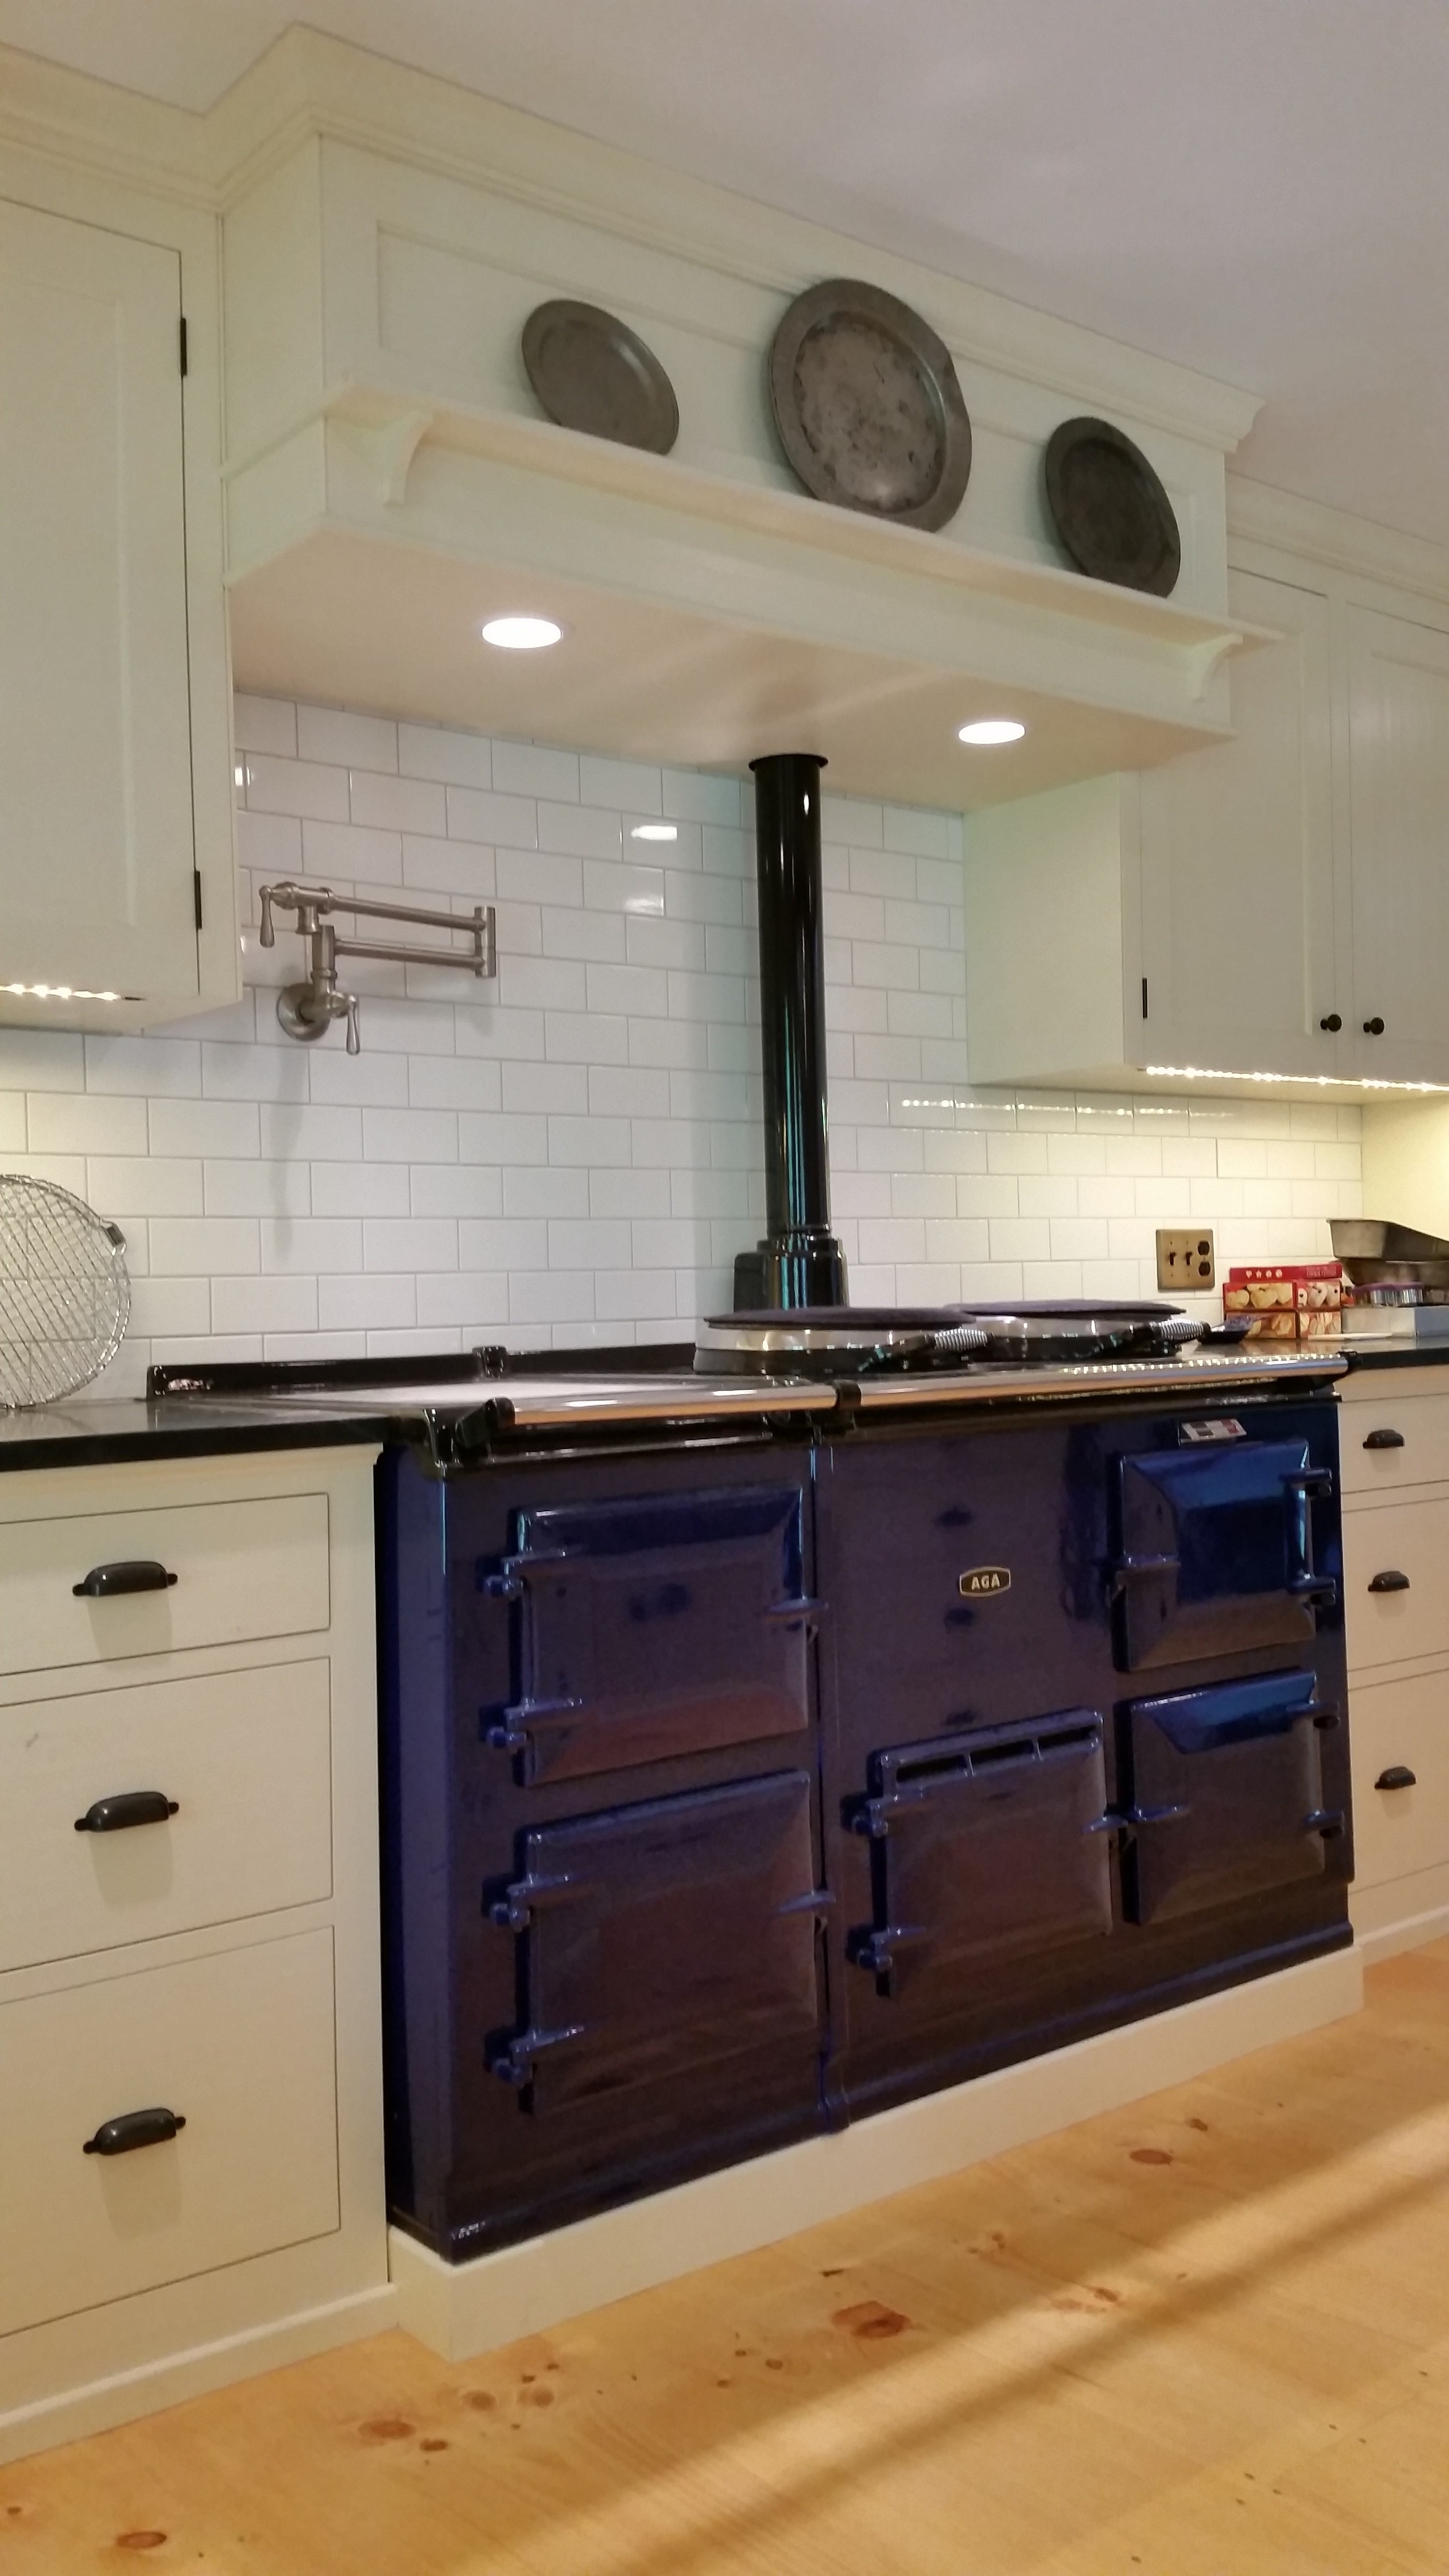
The other stove has never actually been lit since we bought it. It’s too big to fit in the house anywhere except outside in our three-season porch.  The three-season porch which is intended for use from late Spring through early-ish Autumn. Which means that it’s in the one place in the house we can’t go in the one season of the year we could use the extra heat.

How big could a stove be, you ask? It’s about 5 and a half feet high. I’d describe it as more of a fanciful cast iron, wood-burning sculpture than a stove.  In the 1890’s, this thing was like the new iPad. It wasn’t about having the most practical accessory to accomplish the task. It was about having an accessory that was indisputably bigger than anyone else you knew. Never mind if you could fit it into your laptop bag. Or living room. Whatever.  All I know is that the guy at the antique store sold it to us for a song, and delivered it for free.

Yeah.  I’m sort of beginning to see why as well.

Please call me if you’d like a large, cast iron, wood-burningsculpture of your own.

I might just be persuaded to deliver it.

In the spring.

The Grady


Chicken Fort Knox

When we left Massachusetts, we gave away all of our remaining chickens.  I think by the time we left, we were down to a dozen or so, and were happily able to find a few folks to take them off our hands. We still had a good number of consistent layers in that bunch, and it wasn't hard to place them. 

Since we moved to Maine, we've been chicken free. Which is one less thing to worry about, on the one hand. And lord knows, we've certainly had more than a couple of things going on to keep up occupied and out of trouble. But the Critter's been bugging me for a while about sorting out the gap. Because those little feathered producers are her source of income.  We've never given the kids an allowance. So sorting out some kind of revenue stream has been at the top of her list for a while. 

I knew this summer that I didn't want to use the old chicken house that came with the property. It was run down, and the run needed some major upkeep. I had my eye on a bigger space. One of the less used buildings on the property. The old pump house. 

When it came time to construct the new coop, I wanted to incorporate the lessons from the past few years.  A few key goals: 

  • It has to be easy to clean. 
  • Predator-proofing is high on my list - secure fencing. Netted run. 
  • The run has to be big enough to accommodate a couple dozen birds. I'm not into letting them range everywhere, because I'm not into trying to find them. 
  • I hate stooping over in the run. So big is the key. 

The pump house is great in almost every way for this. It's big and roomy. (12'x12'). Well lit with several windows. Has electricity run to it already. Has a concrete knee wall (hard for predators to beat). And is pretty reasonably sited on the property (important in a snowy winter).  Plus, it's right across from the greenhouse door - so I can shoo the chickens in there during the winter if I choose, a trick I've heard from old timers up here. 

The site I chose for the run is the opposite side of the pump house from the house - and it's on a bit of a slope. Remember when I said I didn't want to have to stoop over in the run? That meant that the uphill side of the run is almost 8' high. By the time you get down hill, the posts are just about 10' out of the ground. Which means that the 4"x4" posts I had to order were HUGE. But the soil was mostly easy to dig out 2' post holes for. 

The total run space about 24' x 30' (and a little change), with the pump house occupying one interior corner (plans above). Plenty big enough for chickens to enjoy, I think. It's about 50% larger of a run than we had in Massachusetts . 

 I changed the approach to the fencing this time as well. For the bottom 30"-48" or so (it varied depending on the slope, I used a 1" mesh coated wire of a heavier gauge, buried in a 4-6" trench. (I tried for 6" consistently, but had to adjust occasionally for rocks or roots). 

For the top, I used a coated hex mesh (traditional chicken wire). It's not quite as heavy a gauge of wire, but plenty good for the purpose, and a bit cheaper and easier to maneuver than having continued the heavy gauge wire. 

I included plenty of roosts in the run - there were a few lilac stumps and the cross bracing of the posts to make it easy. And in the corners, I used a few of the larger rocks that I had dug up in the digging phase to brace and provide further predator discouragement. 

One other lesson I learned from the first coop I built was how to deal with compost. We tend to bring all the kitchen compost out to the chickens to give them some variety. (Except for anything we cook with chicken in it. Because that seems wrong). 

The problem is, the kids (who do the actual schlepping to and fro, of course) tend to dump it right inside the run's entrance. Meaning that I end up stepping into a pile of slippery whatever when I go into the run. 

Et voila: I created a compost door in the corner opposite from the chicken run main door. This keeps the compost in a neat corner well away from where I go in and out. 

Sorted. 

We had plenty of knotted netting material left to cover the run - most of the chickens I've lost over the years have been to hawks. Like 2:1 for any other cause. Keeping the chickens in the run (and the predators OUT - there was one horribly bloody afternoon when a young red tailed hawk actually followed the chickens into the old coop through the little chicken door and commenced to slaughtering. It was a very messy day) is about the best thing I can do to help. 

This netting is frightfully expensive, but comes in large lots. I had set it aside for the movers to bring up to Maine for us. Fortunately, we had some competent supervision to get it unrolled and up on the roof. 

On the inside, there were a few things I was keen to address this time around. After a few years of working in and on the old coop, I had some ideas of how to improve. Mostly around how to keep the thing clean more easily. (Even though this is the Critter's business, and she does do all of the daily watering/feeding/egg-collecting, I still seem to end up doing the majority of the coop cleanup. I'm not sure that happened. I have a sneaking suspicion it may indicate which one of us is more naturally inclined to 'management', and which one to 'grunt poop cleaner upper'). 

The inside is bright and sunny - and there's an electric overhead light as well, which I can set on a timer (important during the long winters. Chickens want more than 12 hours of light in a day to lay at peak productivity). 

I gave myself plenty of room for food and other tool storage inside the coop. And I lined the bottom of the interior partition with a knee wall to keep the shavings from spilling out quite so badly. 

You can see the handy hole for the cord of the water warmer. Again - necessary to provision for the cold winters up here. Chickens deal remarkably well with the cold - the settlers managed quite well for a long time before the convenience of heat lamps came along, after all -  but they do need a constant supply of fresh water. 

The nesting boxes are easy, but even here, I managed to incorporate an improvement or two over my previous attempts. One: sloped roof. I know.. that sounds obvious. But while I gave the hens plenty of roosting space, I don't want to encourage them to roost on top of the nesting boxes. It gets messy pretty quickly. 

Two, the roosting bar in front of the nesting boxes (a simple 2"x4" runner) is offset slightly from the front of the nesting boxes. 

IMG_9846.JPG

It's not a wide enough gap for an egg to fall through - not even a bantam egg. But it IS wide enough to easily push out the shavings from the nesting box and let them fall onto the ground. Which will make cleaning up the nesting boxes easy enough for even my daughter to take on. 

Delegation! I'm learning! 

You can still see the old pump house components on the side of the wall - this building's original purpose on the farm is still very evident. 

I'll keep that closed and out of the way. 

The concrete knee wall did mean accommodating the hatch a bit - but nothing the chickens won't easily learn to navigate. (I've seen Hugh Fearnley-Whittingstall train his chickens to a much higher ladder)

The last major mistake-inspired-innovation was a simple way to lift and shift the roosting bars when it came time to clean. I had made the error of permanently attaching the roosting ladder to the wall in the last coop (with a simple pair of screws. But then I had to go get my drill every time it came time to clean to remove it). 

Trust me - this is the single biggest area of manure compilation, as the chickens will poop frequently while roosting. So addressing this from the beginning was high on my list. 

I used a simple pair of eye & hook latches to make it secure, but easy to lift out and hang whenever cleaning time comes around. 

That's pretty much it. The chicks have arrived - just a few to get us started (it's hard to source healthy chicks this time of year), but George has already made it known to them exactly whose herd they belong to.  

dog chicks.jpg

They're a little small yet to move in, but soon enough. 

Let's hope they enjoy their new home. 


Even the bacon tastes better when we cook it here

When we bought the house, there were 3 kitchen areas (and that's not counting the kitchen in the in-law apartment over the barn). One kitchen for the small apartment in the back of the house, another central 'kitchenette' for student boarders. We knew we'd be ripping both of those out as a part of the remodel. 

That left the principle house kitchen. It was dark and close, with a low, swayed ceiling. The space was tucked into the extended/converted 'back house' or barn, squeezed between the dining room and the rear stair case, and almost completely filled with a pinewood island, cabinets and tiled countertops. It did have a pretty new kick-ass professional viking stove that we ended up saving and moving into the barn's in-law apartment. But otherwise, we knew it wasn't laid out well for how we wanted to use the space.  

For example: we had this wild thought that it might be nice to have enough light to see what we were cooking.  That lamp on the counter? That was a necessary addition. Because the space was that dark.  

kitchen.jpeg

Also, see that brick wall above the range? It's kind of hard to tell from the photo, but the mortar had sort of started to fall out in chunks. Which didn't bother me too much, except for occasionally finding mortar crumbs at the bottom of my soup bowl at the end of a meal. 

Not until I came home from work one evening to my Bride's steely-eyed refusal to use the kitchen anymore. This after a family of mice poked their head out of one of the gaps in the brick, and gave her whatever the rodent equivalent of the one fingered salute is while she was trying to toss together a stir fry.  

We ate a lot of take-out after that. 

Fortunately, that was only a few days before we moved into the barn apartment, and got to some serious work on the house demolition

The end product definitely managed to tick the box of "we'd like to have some more light in this space".

20150731_145619.jpg

In many ways, this kitchen was at the heart of the house renovation.

First, it's where we end up spending the majority of our time together as a family. We all love to cook. And even more, we love to eat. The kids end up doing their homework at the counter while we make dinner. Dinner parties end up congregating around the appetizers laid out on the counter. It's the center of the house - pretty much the point you pass through to get anywhere else, one way or the other. 

Second, we knew we wanted to relocate the two stair cases that had been constraining the space. The stairs to the basement, and the back stairs to the second floor were both moved to other locations (the 'up' stairs went along the wall - as you'll see below, and the basement entrance was re-located under the front stairs, in a different part of the house entirely). 

This gave us a huge amount of freedom to design the space to our liking, with plenty of room to stretch things out as we liked.  

We sketched out some basic plans for our awesome architect, who fleshed in the details. (This was the same guy that came back to me with the idea of turning the old 'indoor hot tub' space into a meat room. I love this guy). 

We did make some changes to those planes along the way as we tore back the walls and saw what we had to work with. Those exposed beams and supports, for example - many of which still bear evidence of the whitewash applied when the building was a dairy barn - we left bare and worked into the room. 

One of my favorite ideas, though, was something we saw once on some home renovation show on cable a long time ago. My Bride & I have been joking about this idea for years, and given the opportunity, we insisted we include it from the beginning. Look again at that picture above... there are two dishwashers. 

Think about how insanely clever this is. A dishwasher is basically just a cabinet that happens to wash dishes. Stick some dirty dishes in it. Press a button, and voila: clean. I take dishes out as I need, put dirty ones in the other dishwasher. Press another button, and clean. And the cycle flips. 

Genius. 

The biggest argument we had when we sold our house in Massachusetts was that we had to leave our Aga cooker. My Bride wanted to take it with us. I argued that the people buying our house almost certainly expected to have an oven in the kitchen when they moved in. And they'd likely notice the large hole in the wall if we removed it. I wasn't sure that my Bride bought my logic, but I finally promised that we'd go find another Aga when we moved. 

This one is blue. We found it on Craigslist and brought it home. 

I'm still in love with the Aga as a cooking device, and think I always will be - an oven designed by a nobel prize winning physicist is inherently awesome. And it's even handier up here, where we're two hours closer to the north pole. The kids cuddle up next to its radiant warmth on a cold day, and it is simply lovely to never have to pre-heat the oven when I'm set to cook. 

The cabinets are all from a local place up in Bath, ME. The Kennebec guys designed these beautiful hand-planed cabinets for us to accommodate the giant slab of dark soapstone we found. And we kept the whole thing light by painting it a buttery cream. I never thought I'd end up with painted cabinets, but I love these. 

The leaded-glass hutch in the corner is another built in, incorporating material reclaimed from the home (as mentioned here). And you can see where the stairs shifted to on the other end of the kitchen, along with the little bit of remaining brick - turns out that most of the brick was simply a facade behind the original stove (which was located right in the corner where the bottom landing of those stairs ended up). The bricks that are left are exposed from the back of the dining room fireplace. 

One of the other neat features that ended up solving a problem for us was the downdraft vent behind the range top. 

We cook a lot of stir-frys and such - and while I love my Aga, there are times when you simply need an open flame. In the quest for a perfect cook top, I must have visited and researched and studied and asked around and visited some more about cook tops for months before we settled on this four-burner Wolf. But putting a range top in the island meant we had to figure out how the heck we were going to sort out ventilation. Because this thing puts out a lot of BTUs. And I didn't want to smoke us out of the house every time I turned it on. 

Enter the awesomely retractable downdraft fan. Press a button, and it rises up from the island like the monolith in 2001. (one buddy suggested I hook up a speaker to have it play the opening theme song every time it was raised. My Bride vetoed this.) Press another button and it goes away again. And the thing is powerful enough to suck all the smoke down and out through the floor, avoiding the need for an overhead hood altogether. Hell - this thing could suck the color out of paint. And still somehow quiet. 

Technology is awesome. 

We turned a portion of the side entry around, and created a pantry space off the kitchen. (The window at back leads into the mudroom now). The color was a bold choice to contrast against the light wood we had in the space, and the shelves were designed with purpose.

The back shelves hold appliances - including the power to run them, without having to move them out of their spots - and the side shelves are sized for specific needs. The visible shelves here are intended for canned and preserved goods. The opposite side (out of view) is deep enough for a large cereal box. 

Anything deeper, and we'd lose things in the clutter. This works perfectly for us. 

This kitchen turned out to be everything we could have hoped for, and immediately turned into the heart of our home that we knew that it would. It's bright in the sunshine, and warm in the evening as the autumn turns to winter. It's practically laid out, with plenty of easily accessed storage. Yes, it used up an extravagantly large amount of the back of the house, but the farmhouse is a long, rambling building, with room to spare, so why not? And because of the choice of warm materials, it managed to remain somehow cozy.  

And we haven't seen the mice since we finished. So we love it.